Yealink DECT IP phone quick start guide
Introduction
Setting up your Yealink DECT IP phone with Ooma Office is quick and easy. Follow the instructions below to install your phone. You should be up and calling in a few minutes!
IMPORTANT The Yealink DECT IP phone pairs with a Yealink DECT base station, which is not included. If you do not have a Yealink DECT base station, please visit the Ooma store to purchase one.
NOTE If you do not have an Ooma Office account, please visit http://office.ooma.com/signup.
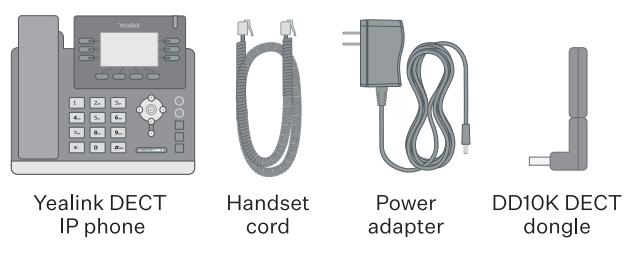
Package Contents

Step 1: Register Phone Online
If your phone is labeled Ready to Call, you may skip this step and continue to Step 2. You may also skip Step 3.
Otherwise, you will need to add your new phone and, if necessary, your new DECT base station to your Ooma Office account.
Visit office.ooma.com/add-ip-phone and follow the on-screen instructions. Make sure you select the appropriate model from the Wireless Phones section.
Step 2: Assemble Your Phone and Attach the DECT Dongle
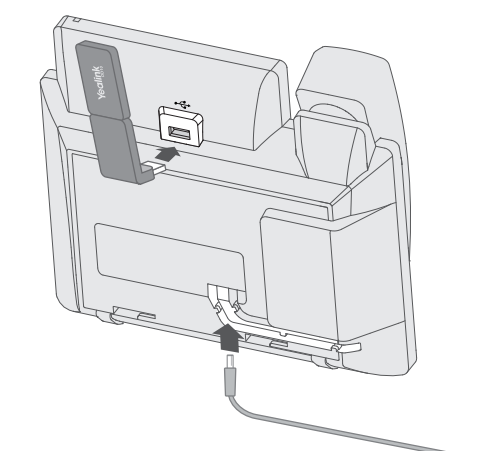
Attach the phone stand to the body and the handset to the phone base. Then, attach the DECT dongle to the USB port on the back of the phone.
Connect the phone to AC power and place it in the general proximity of the Yealink DECT base station (which also requires an AC power conncetion).

NOTE If you need additional help assembling the phone, please refer to the phone manufacturer’s user manual that is included in your box.
Step 3: Pair Phone to Base Unit
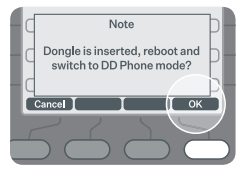
Once the dongle is attached and the phone is powered on, you will see a message on the screen that reads, Dongle is inserted, reboot and switch to DD phone mode? Press the OK soft key. The phone will display Searching for base and then come online.

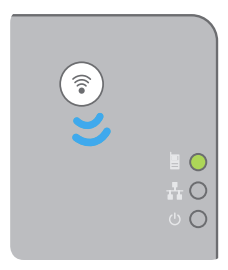
You will then need to pair your phone with the Yealink base unit. Press and hold the base unit’s pairing button until the top LED on the base unit lights up green.

Once you see your extension number (e.g. x1001) and the correct date and time displayed on the screen, your phone is ready to use to make and receive calls!
