Ooma DP1 desk phone quick start guide
Introduction
Setting up the Ooma DP1 Desk Phone is quick, and can be accomplished in just a few simple steps. The phone’s nominal range is approximately 150 ft from your Ooma Office Base Station. The actual range may vary depending on the building materials in the environment that the phone is installed in.
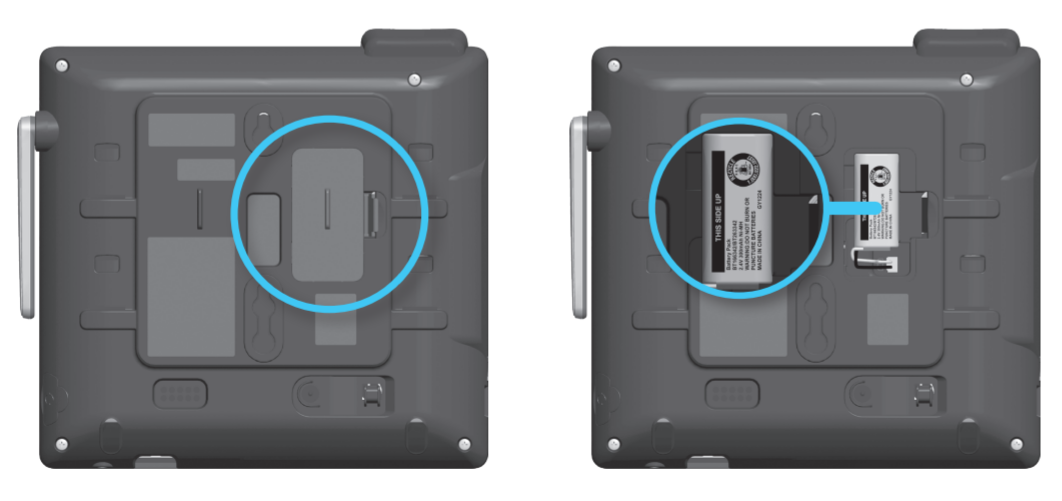
Step 1: Install the Backup Battery
In the event of a power failure, the charged backup battery allows the phone to continue to operate for a short time. The backup battery will charge when the phone is connected to AC power.
Press down on the tab to open the battery compartment cover. Connect the battery cable and place the battery in the compartment with the THIS SIDE UP label facing up. Replace the battery compartment cover.
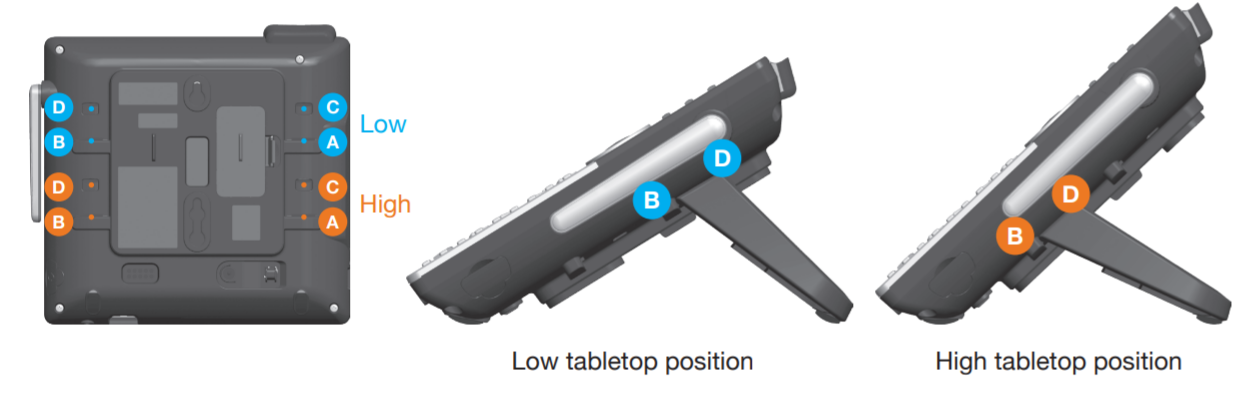
Step 2: Install the Mounting Bracket
Insert the fixed tabs of the mounting bracket into slots A and B, and then insert the flexible tabs into slots C and D. There are two sets of tabs (High and Low) depending on your positioning preference.
Step 3: Connect the Handset and Power Cord
Plug the small end of the power adapter into the power jack at the bottom of the desktop phone and the other end to a power outlet. Plug the end of the coiled handset cord into the handset jack at the bottom of the desktop phone.
Step 4: Pair the Phone with the Ooma Office Base Station
If your phone is labeled Ready to Call, you may skip this step and continue to Step 5.
Otherwise, you will need to add your new phone to your Ooma Office account.
Visit office.ooma.com/add_device and follow the on-screen instructions.
Step 5: Let Your Phone Download Updates
Once the phone is powered on and connected to the Internet, the startup process will commence automatically. It may need to download and install a software update. This process may take several minutes.
When you see your name and extension number (e.g. x1001) displayed on the screen, your phone is ready to use to make and receive calls!
