Ooma cordless IP phone quick start guide
Introduction
Setting up your cordless Ooma IP phone with Ooma Office is quick and easy. Follow the instructions below to install your phone. You should be up and calling in a few minutes!
NOTE If you do not have an Ooma Office account, please visit office.ooma.com/signup.
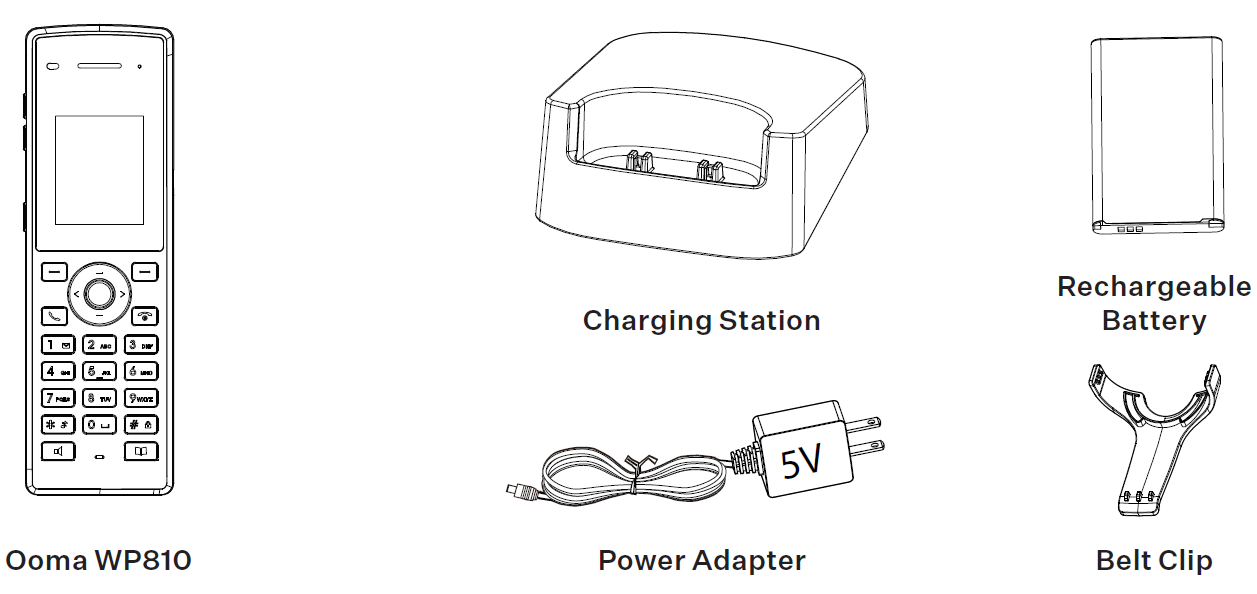
Package Contents
Step 1: Add the Phone to Your Account
If your phone is labeled Ready to Call, you may skip this step and continue to Step 2.
Otherwise, you will need to add your new phone to your Ooma Office account.
Visit http://office.ooma.com/add-ip-phone and follow the on-screen instructions.
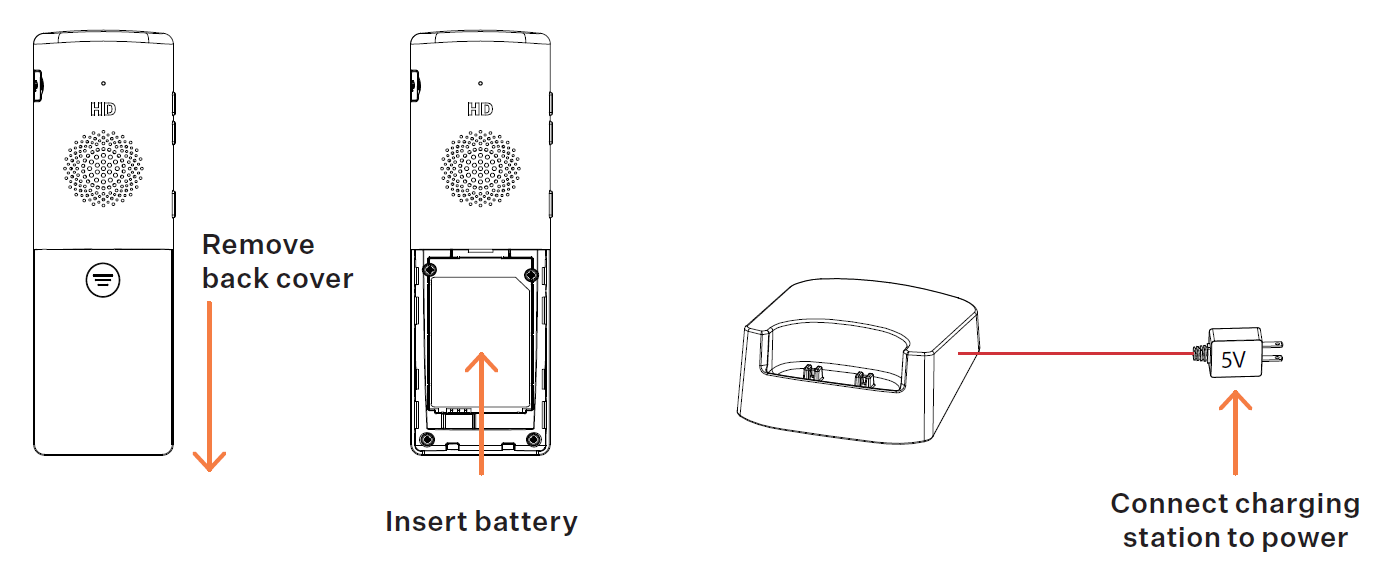
Step 2: Assemble Your Phone
Insert the battery into the handset and replace the cover. Then, optionally, attach the belt clip.
Connect the charging station to a power source and charge the handset.
Step 3: Connect Your Phone
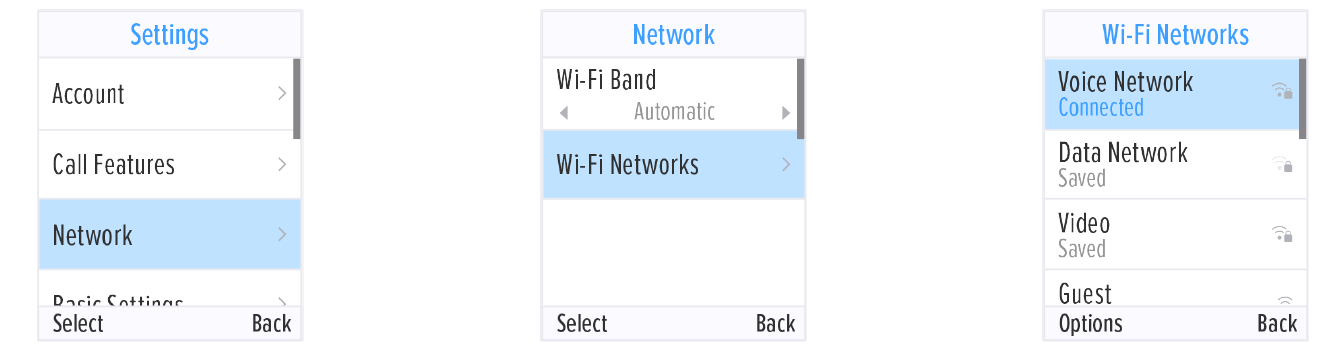
Once the phone is fully charged, press the Menu softkey, then navigate to Settings > Network > Wi-Fi Networks. A list of Wi-FI networks will be displayed.
Select the network you’d like to connect to, then press the Select key. Scroll down to the Password field and enter your password, then press the Connect softkey.
Note: To enter your password, you will need to use a multi-tap approach with the phone keypad. Press the corresponding number key repeatedly until the desired number or letter appears. Press the # key to change input modes.
For more detailed instructions and for entering passwords, please visit support.ooma.com/ooma-phone-wi-fi.
Once you see your extension name displayed on the phone’s screen, your phone is ready to make and receive calls!