Setting microphone permissions for the Ooma Office Desktop App (Pro)
If you are getting an error that says something along the lines of, “Unable to access microphone. Please check your system settings,” while you are using the Ooma Office Desktop application, it is because microphone access permissions have not been granted to the app by your computer’s operating system, or because your microphone has not been properly set up.
The steps below will help you to configure your microphone and speaker correctly so that you can make and receive calls with the Ooma Office Desktop application. Make sure to follow the steps in the section that is applicable to your operating system.
Mac
When you install the Ooma Office Desktop application, you will be asked to grant permission to access your computer’s microphone and speaker. The application will use the computer’s default audio settings.
If you did not allow access to access microphone during application installation, you can do so later by following these instructions:
- Use the Apple menu to open your System Preferences.
- Click Security & Privacy, then click Privacy.
- Select Microphone.
- Tick the checkbox next to Ooma Office to allow the application to access the microphone.
Windows 10
There are a few different things you will need to check on your Windows 10 computer if your microphone is not working. When you are done checking and updating your settings, be sure to restart the Ooma Office Desktop application so that it can begin making and receiving calls.
Check microphone privacy settings
- Click the Windows icon and select Settings.
- Select Privacy, then Microphone.
- In the Microphone Privacy setting menu, click “Change” to allow apps to access your microphone. Make sure that the setting is turned on. If the setting is already turned on, toggle it off and then on again.
- In the Allow desktop apps to access your microphone menu, make sure the selection is turned on. If it isn’t turned on, switch the toggle to the right position to allow applications to use the microphone.

Remove exclusive microphone access
- Click the Windows icon and type “Control Panel” in the search panel to open the Control Panel.
- Select Sound. If you are using legacy view, find the Hardware and Sound menu and then select Sound.
- Click the Recording tab, select the microphone you will use with Ooma Office Desktop app (i.e., Headset Mic), and click Properties.
- In the Properties window, select the Advanced tab. Uncheck the “Allow applications to take exclusive control of this device” setting and click Apply.
- Repeat the same steps for the Playback tab.
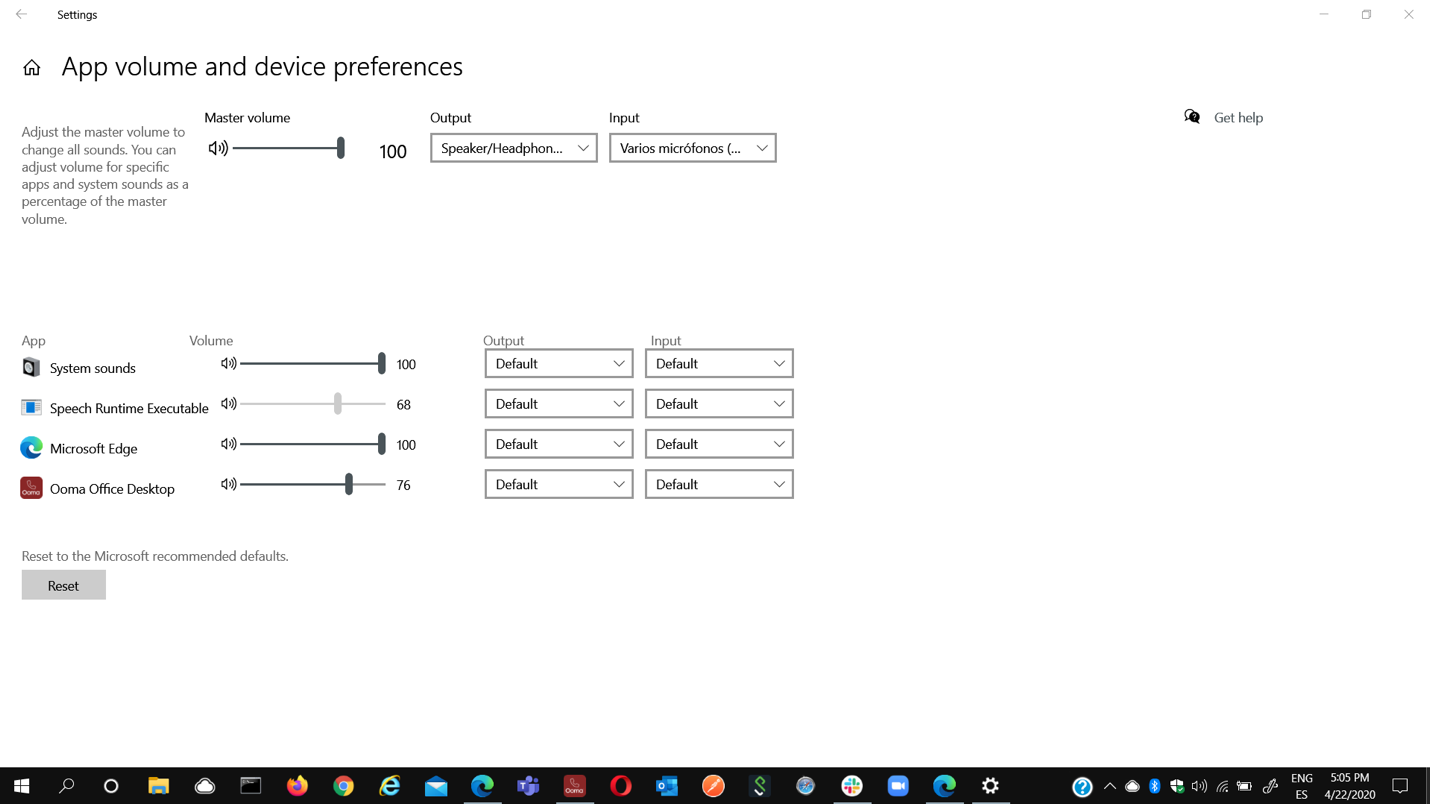
Set the default microphone for Ooma Office
- Click the Windows icon and select Settings.
- Select System, then Sound.
- Under the Advanced sound options, select the device prefernces for the Ooma Office Desktop application. Note that this application will only appear in the menu if you have used it to make at least one call.
- The application defaults to using the computer’s default input and output devices. Use the dropdown menus to select the appropriate microphone and speakers: \
Windows 8.1
There are a few different things you will need to check on your Windows 8.1 computer if your micrphone is not working. When you are done checking and updating your settings, be sure to restart the Ooma Office Desktop application so that it can begin making and receiving calls.
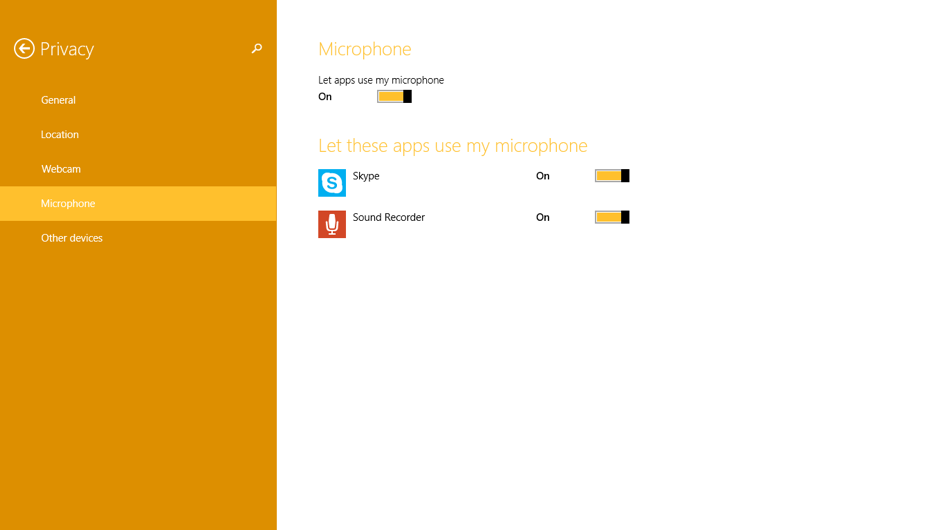
Check microphone privacy settings
- Click the Windows icon and type “Microphone privacy” in the search panel to open the Microphone privacy settings.
- Toggle the “Let apps use my microphone” setting to On. If it is already turned on, toggle it off and then on again:
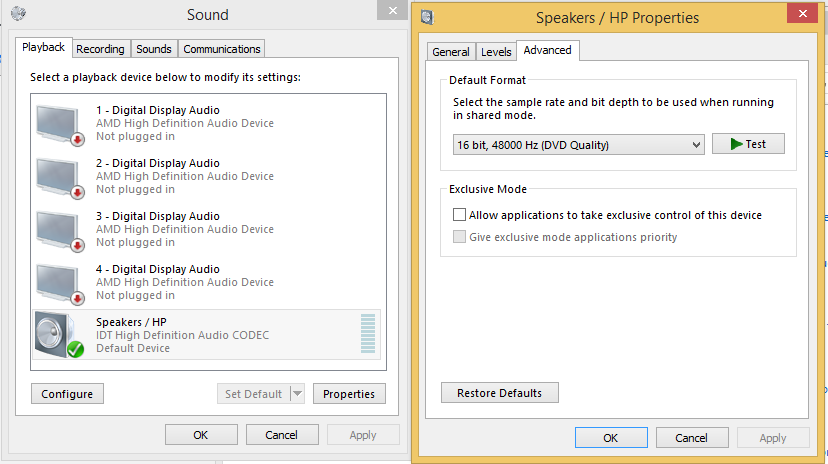
Remove exclusive microphone access
- Click the Windows icon and type “Control Panel” in the search panel to open the Control Panel.
- Select Hardware and Sound on the Control Panel, then click Sound.
- Click the Recording tab, select the microphone you will use with Ooma Office Desktop app (i.e., Headset Mic), and click Properties.
- In the Properties window, select the Advanced tab. Uncheck the “Allow applications to take exclusive control of this device” setting and click Apply.
- Repeat the same steps for the Playback tab.